Blog

  • Free Crochet Keychain Pattern – A Cute Mini Amigurumi You’ll Love

    Free Crochet Keychain Pattern – A Cute Mini Amigurumi You’ll Love

    Best Crochet Keychains, Crochet Amigurumi Free Patterns

    Crochet keychains are delightful little accessories that can add a personal touch to your keys, bags, or even make charming gifts for friends and loved ones. Their miniature size makes them both adorable and easy to create. With a plethora of designs available—ranging from cute animals to whimsical food items—these crochet treasures provide a fun project for both beginners and seasoned crafters alike. Not only do they serve as practical items, but they also allow you to express your creativity and showcase your crochet skills. In this roundup, we present 14 of the best free amigurumi crochet keychain patterns, perfect for beginners who are eager to make small, easy, and utterly cute keychain creations.

    Crochet Keychain Pattern Overview

    • Skill Level: Beginner
    • Finished Size: Varies by design
    • Crochet Hook Size: Typically 3.5mm to 4mm
    • Yarn Type: Worsted or DK yarn
    • Yarn Weight: Light or Medium
    • Main Colors: Various, depending on the chosen design
    • Construction Method: Worked in rounds
    • Approximate Completion Time: 1-3 hours, depending on complexity
    • Project: Beginner-friendly
    • Keychain Attachment: Keychain ring or clasp

    Materials You’ll Need

    • Yarn (in selected colors)
    • Crochet hook (size recommended on the pattern)
    • Keychain ring or clasp
    • Yarn needle
    • Stitch marker
    • Scissors
    • Stuffing (if required)
    • Safety eyes (if used)
    • Embroidery thread (if specified)
    • Any additional decorative elements

    Crochet Abbreviations

    • MR = magic ring
    • ch = chain
    • sc = single crochet
    • inc = increase
    • dec = decrease
    • sl st = slip stitch
    • st = stitch
    • rep = repeat

    Before You Start

    Before you begin crocheting your keychain, consider these tips for a successful project:

    • Work in Continuous Rounds: This helps avoid the visible seam lines that can occur when working in rows.
    • Use a Stitch Marker: This will help keep track of the beginning of your rounds.
    • Maintain Tight Even Stitches: This ensures that your keychain doesn’t have gaps, keeping stuffing from being visible.
    • Prepare for Keychain Attachment: Plan how and where you will attach the keychain ring or clasp before you finish your crochet piece.

    Free Crochet Keychain Pattern

    The following sections break down the construction of your crochet keychain. Each section covers the specific components required based on your selected design.

    Foundation or Magic Ring

    Start with a magic ring to create a tight center for your keychain.

    Round 1: sc 6 into the magic ring.

    Main Body

    Continue to build the body according to your specific pattern instructions.

    Round 2: inc in each st around (12 st).

    …

    (A full pattern would go here; continue building out additional details for each section based on the specific amigurumi design.)

    Attaching the Keychain Ring

    To attach the keychain ring:

    1. Identify where you would like to place the keychain attachment.
    2. Thread the keychain ring through the last few stitches of your piece.
    3. Secure the yarn ends so that the attachment is sturdy.

    Finishing Details

    Complete your keychain by adding any final touches such as embroidered facial features or decorative details. Ensure all loose ends are secured to avoid unraveling.

    How to Use Your Crochet Keychain

    Your crochet keychain can serve various purposes:

    • Attach it to your keys for a personal touch.
    • Use as a charming backpack charm.
    • Clip onto handbags for extra flair.
    • Give it as a thoughtful handmade gift.

    Tips for a Better Result

    • Maintain even tension throughout your work.
    • Make color changes neat and symmetrical for a polished finish.
    • Secure stuffing properly to avoid visible bulges.

    Crochet Keychain Customization Ideas

    • Experiment with different yarn colors and textures.
    • Add unique embroidered designs or initials.
    • Create decorative bows or accessories to enhance the look.

    Common Problems and Troubleshooting

    • Uneven Stitch Counts: Always check your count at the end of each round to maintain uniformity.
    • Loose Stitches: Ensure your tension is consistent for a neat finish.

    Care and Safety

    Care for your crochet keychain according to yarn instructions. Pay attention to small parts such as safety eyes, ensuring they are securely attached, especially if the keychain is intended for children.

    Frequently Asked Questions

    1. Is this crochet keychain pattern beginner-friendly?
      Yes, it’s designed specifically for beginners.

    2. What yarn is best for crochet keychains?
      Any worsted weight or DK yarn works well.

    3. How long does it take to crochet a keychain?
      It typically takes 1-3 hours, depending on the complexity of the design.

    4. Can I use different yarn colors?
      Absolutely! Feel free to play with color combinations.

    5. How do I attach a keychain ring?
      Position it at the top of your keychain piece and secure it through the last stitches.

    Conclusion

    Crafting your own crochet keychain is a delightful way to express your creativity. With cute and simple patterns available, you can make personalized gifts that are sure to brighten anyone’s day. Dive into the world of mini amigurumi keychains, and enjoy the process of making these charming little accessories!


    SEO Title: 14 Best Crochet Keychains: Free Amigurumi Patterns

    Meta Description: Discover 14 adorable, beginner-friendly crochet keychain patterns! Create cute mini amigurumi animals, food, and more, perfect for gifts or personal use.

    URL Slug: crochet-keychains-free-patterns

    Primary Keyword: crochet keychain pattern

    Secondary Keywords: free crochet keychain pattern, easy crochet keychain, amigurumi keychain pattern, handmade crochet keychain, DIY crochet keychain

    Image 1 Alt Text: A collection of colorful crochet keychains hanging from a bag.

    Image 2 Alt Text: A close-up of a cute crochet animal keychain with safety eyes.
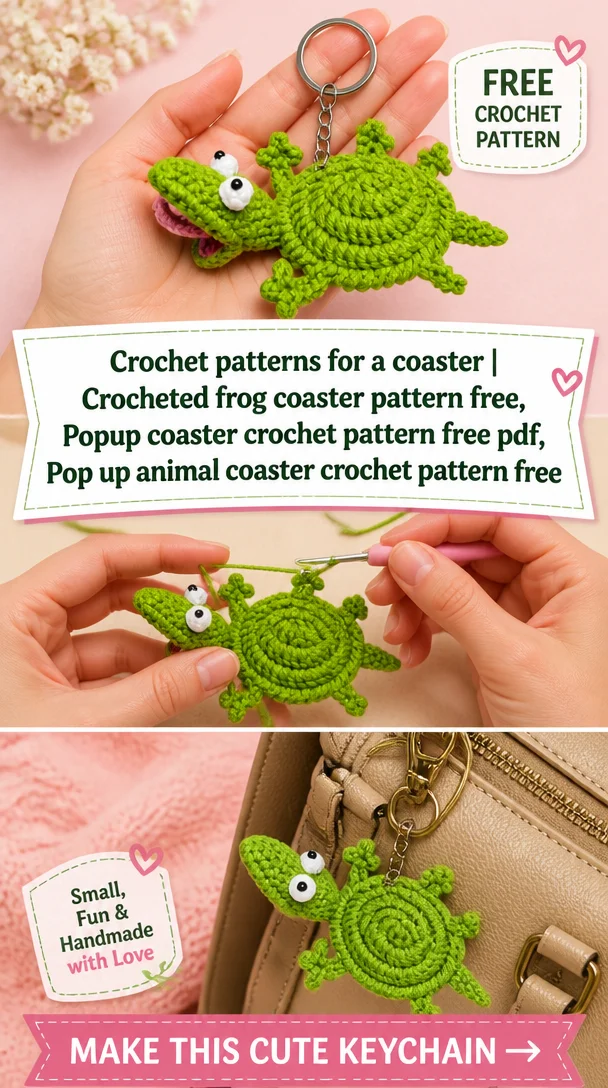
  • Crochet patterns for a coaster | Crocheted frog coaster pattern free, Popup coaster crochet pattern free pdf, Pop up animal coaster crochet pattern free

    Crochet patterns for a coaster | Crocheted frog coaster pattern free, Popup coaster crochet pattern free pdf, Pop up animal coaster crochet pattern free

    Crochet patterns for a coaster | Crocheted frog coaster pattern free, Popup coaster crochet pattern free pdf, Pop up animal coaster crochet pattern free

    If you’re looking to add a playful touch to your everyday items, crochet keychains featuring mini amigurumi designs are a delightful choice. The crocheted frog design, inspired by the charming Popping Lizard Coaster, brings an element of whimsy and cuteness to your keys or bags. This adorable keychain not only makes for a perfect accessory but also serves as a thoughtful handmade gift for friends and family. Whether you’re a beginner or an experienced crocheter, this fun project is a great way to showcase your skills while creating something uniquely yours. Plus, its small size means it won’t take too long to complete, making it ideal for any occasion!

    Crochet Keychain Pattern Overview

    • Skill Level: Beginner
    • Finished Size: Approximately 3-4 inches
    • Crochet Hook Size: 3.5 mm (E)
    • Yarn Type: Cotton or acrylic
    • Yarn Weight: Worsted weight
    • Main Colors: Green, yellow (for accents)
    • Construction Method: Worked in rounds
    • Approximate Completion Time: 2-3 hours
    • Project Type: Finished in one piece
    • Keychain Attachment Type: Keyring or clasp

    Materials You’ll Need

    • Worsted weight yarn (green and yellow)
    • 3.5 mm crochet hook
    • Keychain ring or clasp
    • Yarn needle
    • Stitch marker
    • Scissors
    • Stuffing (polyester fiberfill, if required)
    • Safety eyes (optional for facial features)
    • Embroidery thread (for detailing)

    Crochet Abbreviations

    • MR = magic ring
    • ch = chain
    • sc = single crochet
    • inc = increase
    • dec = decrease
    • sl st = slip stitch
    • st = stitch
    • rep = repeat

    Before You Start

    Get ready to crochet this delightful frog keychain by gathering your materials and preparing your workspace. Here are some tips to ensure a smooth process:

    • Work in Continuous Rounds: Keep your work smooth without joins for a cleaner finish.
    • Use a Stitch Marker: Mark the beginning of each round to keep track of your progress.
    • Maintain Tight Stitches: This helps to avoid gaps and ensures a neat appearance.
    • Prepare Your Keychain: Have your keyring or clasp ready for the final attachment.

    Free Crochet Keychain Pattern

    Foundation or Magic Ring

    1. Create a magic ring.
    2. Round 1: 6 sc in the magic ring (6).
    3. Round 2: Inc in each st around (12).
    4. Round 3: Sc in next st, inc in next st; repeat around (18).

    Main Body

    1. Round 4-10: Sc in each st around (18).

    Head

    1. Round 11: Sc in next st, dec; repeat around (12).
    2. Round 12: Dec around (6).
    3. Finish off and leave a long tail for sewing.

    Ears (Make 2)

    1. Using green yarn:
      • R1: Ch 3, sl st to form a ring.
      • R2: Sc in ring, finish off.

    Attaching the Keychain Ring

    1. Position the head atop the body and sew securely with your yarn needle.
    2. Attach the ears on either side of the head, securing them well.
    3. To attach the keyring, use the long tail from the body; thread it through the top of the frog and attach the clasp.

    Finishing Details

    To add charm to your finished keychain, consider the following details:

    • Embroidered Features: Use embroidery thread to add eyes or mouth stitches to personalize your frog.
    • Secure All Ends: Weave in all yarn ends neatly to maintain the aesthetic.

    How to Use Your Crochet Keychain

    This charming crocheted frog keychain can be used in various delightful ways:

    • Attach it to your keys for a whimsical touch.
    • Use it as a backpack charm to showcase your personality.
    • Gift it to a friend as a thoughtful, handmade accessory.

    Tips for a Better Result

    • Keep Stitches Neat: Work with tight tension to ensure a tidy finish.
    • Avoid Visible Stuffing: Use minimal stuffing to maintain the shape.
    • Position Details Symmetrically: Ensure facial features are placed evenly for a balanced look.

    Crochet Keychain Customization Ideas

    Personalize your frog keychain with ideas such as:

    • Using different greens or adding spots for a unique look.
    • Embroidering personalized messages.
    • Experimenting with different keychain hardware styles.

    Common Problems and Troubleshooting

    If you encounter issues during your crochet journey, refer to these tips:

    • Uneven Stitch Counts: Double-check your rounds during work.
    • Looseness in Stitches: Maintain consistent tension to improve overall appearance.
    • Misaligned Pieces: Take your time when positioning pieces before sewing them together.

    Care and Safety

    To care for your crochet keychain, follow these guidelines:

    • Hand wash gently according to yarn care instructions.
    • For small parts such as safety eyes, ensure they are securely attached, especially if children will be using the item.

    Frequently Asked Questions

    • Is this crochet keychain pattern beginner-friendly? Yes! It’s perfect for beginners looking to practice their basics.
    • What yarn is best for crochet keychains? A worsted weight cotton or acrylic yarn is ideal.
    • How long does it take to crochet a keychain? Expect to finish in about 2-3 hours, depending on your skill level.
    • Can I make this crochet keychain larger or smaller? Adjusting yarn weight or hook size can change the finished size.
    • How do I attach a keychain ring? Simply sew through the top of your finished piece and secure it with a clasp.
    • Can I use different yarn colors? Absolutely! Color combination is encouraged for your personalized touch.
    • How do I keep the finished keychain in shape? Ensure tight stitches and adequate stuffing to maintain its appearance.
    • Can I use this crochet keychain as a bag charm? Yes! It makes a fantastic and cute accessories for bags.

    Conclusion

    Crocheting a frog keychain is a delightful way to express your creativity while crafting a useful accessory. With its charming design and the ability to personalize, this project can be a fun addition to your crochet repertoire or a precious gift for friends. Dive into this free crochet pattern and enjoy the delightful journey of bringing your froggy friend to life!


    SEO Title: Cute Crochet Frog Keychain Pattern for Beginners

    Meta Description: Create a charming crochet frog keychain with our easy beginner-friendly pattern! Perfect for gifts or embellishments, learn to crochet today!

    URL Slug: crochet-frog-keychain-pattern

    Primary Keyword: crochet keychain pattern

    Secondary Keywords: crochet keychain, mini crochet keychain, easy crochet keychain, crochet animal keychain, crocheted frog keychain

    Image 1 Alt Text: Cute crocheted frog keychain on a wooden table

    Image 2 Alt Text: Crocheted frog with keychain attachment displayed with supplies

  • SUMMER ’22: CROCHET WRISTLET (UPDATED)

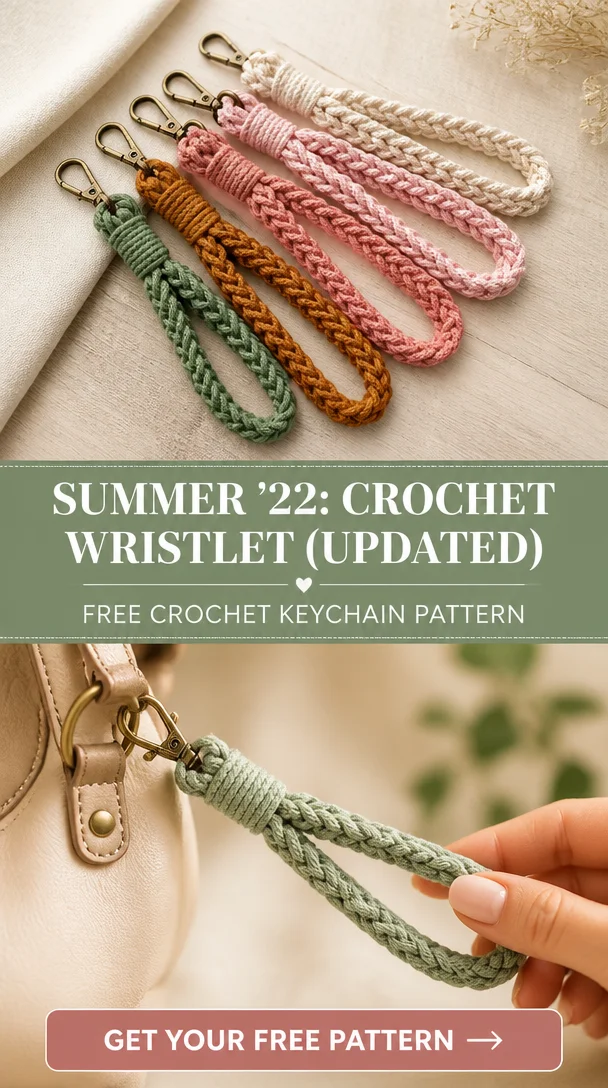
    SUMMER ’22: CROCHET WRISTLET (UPDATED)

    SUMMER ’22: CROCHET WRISTLET (UPDATED)

    Welcome to the latest addition in our summer crochet series! The focus today is on the adorable crochet wristlet keychain, a delightful and functional project that is perfect for markets or as a handmade gift. This cute design not only adds flair to your keys but can also double as a charming bag charm or decorative accessory. What makes this particular wristlet stand out is its portability and practicality—crafted using the simple I-cord technique, it offers both style and ease. Don’t worry if this technique seems daunting; it’s remarkably easy! If you can create a chain and draw up a loop, you are more than capable of completing this project. Ideal for crocheters of all skill levels, this pattern takes only about 10-15 minutes to crochet, making it an excellent choice for beginners and seasoned crocheters alike.

    Crochet Keychain Pattern Overview

    • Skill Level: Beginner-friendly
    • Finished Size: Approximately the size of a standard keychain
    • Crochet Hook Size: Not specified
    • Yarn Type: Not specified
    • Yarn Weight: Not specified
    • Main Colors: Choose your favorite colors
    • Construction Method: I-cord technique
    • Approximate Completion Time: 10-15 minutes
    • Project is worked: Continuous
    • Type of Keychain Attachment: Ring or clasp

    Materials You’ll Need

    • Yarn (in your choice of colors)
    • Crochet hook (size not specified)
    • Keychain ring or clasp
    • Yarn needle
    • Stitch marker
    • Scissors

    Crochet Abbreviations

    • ch = chain
    • st = stitch

    Before You Start

    Before starting your crochet wristlet, here are some helpful tips to ensure a smooth crafting experience:

    • Familiarize with the I-cord technique: It’s a simple method, and you’ll find it straightforward once you start.
    • Use a stitch marker: This is helpful in keeping track of your stitches, especially when working in continuous rounds.
    • Maintain even tension: This will keep your work neat and professional-looking.

    Free Crochet Keychain Pattern

    Let’s get into crafting your crochet wristlet keychain!

    Foundation or Magic Ring

    1. Begin with a slip knot
    2. Create a chain of desired length (for your I-cord)

    Main Body

    1. Work in the I-cord technique, keeping your rows tight and even.
    2. Continue to crochet until the wristlet reaches your desired length.

    Attaching the Keychain Ring

    1. Once your desired length is achieved, thread the end through the keychain ring or clasp.

    Finishing the Keychain

    1. Weave in any loose yarn ends securely.

    Keychain Construction and Assembly

    1. Position the completed I-cord to create a loop.
    2. Secure the ends together with a slip stitch.
    3. Attach the keychain ring or clasp at this position.

    Attaching the Keychain Ring or Clasp

    • The keychain ring should be threaded through the completed I-cord and secured by ensuring tight closure, keeping the piece stable.

    Finishing Details

    1. You may choose to embroider small details or add embellishments to personalize your wristlet.
    2. Ensure all ends are securely fastened to avoid unraveling.

    How to Use Your Crochet Keychain

    Your wristlet keychain can brighten up various aspects of your life:

    • Attach it to your keys for easy access.
    • Use it as a charming accessory for your backpack.
    • Gift it to friends or family as a personalized touch.

    Tips for a Better Result

    • Maintain even tension: This is crucial for a uniform look.
    • Keep stitches neat and tidy: Pay attention to your work, especially when starting new rounds.
    • Secure all yarn ends: This will prevent any unraveling and give your piece a polished finish.

    Crochet Keychain Customization Ideas

    Here are some fun ideas to make your wristlet unique:

    • Experiment with different yarn colors for a vibrant look.
    • Add decorative bows or charms for extra flair.
    • Personalize with your initials or favorite patterns through embroidery.

    Common Problems and Troubleshooting

    • Uneven stitches: Practice on a scrap piece if you notice inconsistencies.
    • Loose stitches: Tighten your grip on the yarn while working.
    • Misaligned pieces: Take care to secure your stitches in the correct position when attaching the hardware.

    Care and Safety

    To keep your crochet wristlet keychain looking fresh:

    • Follow the yarn manufacturer’s washing instructions for cleaning.
    • Be mindful of small detachable parts if children are around.

    Frequently Asked Questions

    • Is this crochet keychain pattern beginner-friendly? Yes, it’s perfect for beginners!
    • What yarn is best for crochet keychains? Choose a durable yarn; any yarn that’s fun to work with will be fine.
    • How long does it take to crochet a keychain? Approximately 10-15 minutes.
    • Can I make this crochet keychain larger or smaller? Yes, simply adjust your I-cord length.
    • How do I attach a keychain ring? Just thread it through and secure it well.
    • Can I use different yarn colors? Absolutely, mix and match to your heart’s content!

    Conclusion

    The crochet wristlet keychain is an engaging project that combines cuteness with practicality. It’s not only a great way to showcase your crochet skills but also a fun gift that anyone would appreciate. So go ahead, grab your yarn and crochet hook, and start crafting one today!


    SEO Title: Summer ’22 Crochet Wristlet – Free Keychain Pattern
    Meta Description: Discover the easy crochet wristlet keychain pattern! Perfect for markets or gifts, this fun project takes only 10-15 minutes to complete.
    URL Slug: summer-22-crochet-wristlet
    Primary Keyword: crochet wristlet keychain
    Secondary Keywords: free crochet keychain pattern, crochet keychain pattern, easy crochet keychain, mini crochet keychain, DIY crochet keychain
    Image 1 Alt Text: Finished crochet wristlet keychain hanging from keys
    Image 2 Alt Text: Close-up of a colorful crochet wristlet keychain with a decorative clasp

  • Free Crochet Keychain Pattern – A Wheat Stitch Lanyard You’ll Love

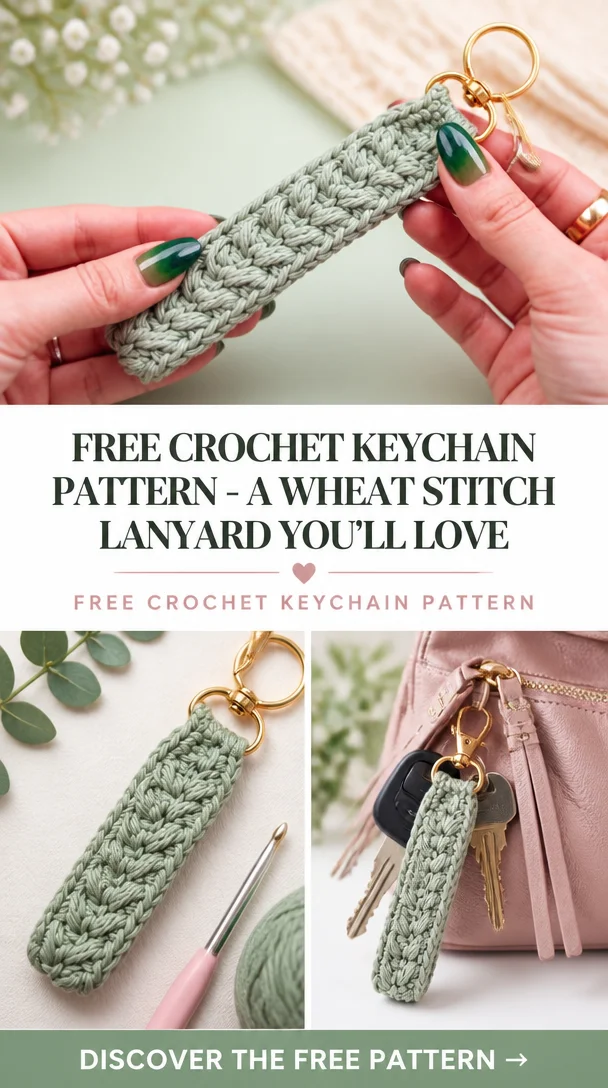
    Free Crochet Keychain Pattern – A Wheat Stitch Lanyard You’ll Love

    Free Wheat Stitch™ Keychain & Lanyard Crochet Pattern – Quick, Textured Everyday Accessories

    If you love adding a personal touch to your accessories, this Free Wheat Stitch™ Keychain & Lanyard Crochet Pattern is perfect for you! This delightful design combines functionality and flair, making it an adorable addition to your keys, bags, or even as a handmade gift. The textured wheat stitch adds an attractive and unique look, ensuring that this keychain stands out. Easy to crochet, this pattern is suitable for crocheters of all skill levels, allowing you to create a charming mini amigurumi that’s both stylish and practical. What’s more, it’s an excellent way to brighten up your everyday essentials or to surprise a friend with a thoughtful, DIY gift!

    Crochet Keychain Pattern Overview

    • Skill Level: Easy to Intermediate
    • Finished Size: Approximately 4 inches long
    • Crochet Hook Size: US size G/6 (4.0 mm)
    • Yarn Type: Medium (worsted weight) yarn
    • Yarn Weight: #4
    • Main Colors: Choose your favorite hue!
    • Construction Method: Worked in rows with some assembly required
    • Approximate Completion Time: 1-2 hours
    • Beginner-Friendly: Yes
    • Working Method: Constructed in rows
    • Keychain Attachment: Keychain ring or clasp

    Materials You’ll Need

    • Medium weight yarn
    • Crochet hook (size G/6)
    • Keychain ring or clasp
    • Yarn needle
    • Stitch marker
    • Scissors

    Crochet Abbreviations

    • MR = magic ring
    • ch = chain
    • sc = single crochet
    • hdc = half double crochet
    • dc = double crochet
    • sl st = slip stitch
    • inc = increase
    • dec = decrease
    • st = stitch
    • rep = repeat

    Before You Start

    Before diving into this delightful crochet project, consider using a stitch marker to track your rounds. As you’ll be working in rows, maintaining even tension is essential. Familiarize yourself with the wheat stitch technique if you are new to it, and prepare your keychain ring for assembly at the end of the project. This will make the finishing touches a breeze!

    Free Crochet Keychain Pattern

    Foundation

    1. Magic Ring: Begin by creating a magic ring.
    2. Foundation Row: Ch 2, then work 10 hdc into the ring. Tighten the ring and sl st to the first hdc.

    Main Body

    1. Row 1: Ch 2, hdc in each st across. (10 hdc)
    2. Row 2-4: Repeat Row 1 for three additional rows. (10 hdc each)

    Finishing the Keychain

    1. Trim the Yarn: Leave a long tail for attaching to the keychain.
    2. Join Rows: Fold the piece in half and sl st along the edges to secure all parts.
    3. Attach Keychain Ring: Use the long tail to secure the piece to the keychain ring.

    Keychain Construction and Assembly

    To assemble your keychain, ensure that each section is securely joined. Position your main body appropriately before attaching the keychain ring. Use your yarn needle to sew all loose ends neatly and ensure no stuffing is visible.

    Attaching the Keychain Ring or Clasp

    The keychain ring can be attached by threading the piece directly through the loop at the top or by weaving it into the fabric for a more secure hold. Make sure to secure any yarn ends behind the attachment point to maintain a clean finish.

    Finishing Details

    To enhance the appearance of your keychain, consider adding embroidered facial features, if applicable, or decorative stitch patterns to elevate its charm. Secure all loose yarn ends to avoid unraveling.

    How to Use Your Crochet Keychain

    This versatile crochet keychain makes a fantastic accessory that serves several purposes:

    • Keychain accessory
    • Stylish backpack charm
    • Handbag decoration
    • Thoughtful handmade gift
    • Personal decorative touch

    Tips for a Better Result

    • Maintain a consistent tension to keep your stitches uniform.
    • Avoid visible stuffing by ensuring each piece is stuffed smoothly.
    • Position details, such as facial features and embellishments, symmetrically for a polished look.

    Crochet Keychain Customization Ideas

    Consider these customization options to give your keychain a personal flair:

    • Use different yarn colors for a unique look.
    • Add embroidered names or initials for personalization.
    • Experiment with various yarn types, such as cotton for durability.
    • Incorporate decorative bows or charms that reflect your style.

    Common Problems and Troubleshooting

    • Uneven stitch counts: Always double-check your stitch count after each row.
    • Loose stitches: Ensure that you maintain an even tension throughout.
    • Visible stuffing: Always use the appropriate amount of stuffing and check the seams.

    Care and Safety

    To keep your crochet keychain looking great, follow the yarn manufacturer’s care instructions. Be mindful of small detachable parts, as some may not be suitable for very young children.

    Frequently Asked Questions

    • Is this crochet keychain pattern beginner-friendly?
      Yes, it’s ideal for crochet beginners and easy to follow.

    • What yarn is best for crochet keychains?
      Medium weight yarn (#4) like cotton or acrylic works best for durability.

    • How long does it take to crochet a keychain?
      Typically, it takes about 1-2 hours to complete this project.

    • Can I make this crochet keychain larger or smaller?
      Yes, you can adjust the size by changing your hook and yarn weight.

    • How do I attach a keychain ring?
      The pattern includes instructions for attaching the keychain ring securely.

    Conclusion

    The Free Wheat Stitch™ Keychain & Lanyard Crochet Pattern is your ticket to crafting a stylish and functional accessory that reflects your personality. With its textured design and easy-to-follow instructions, you’ll enjoy creating this delightful keychain for yourself or loved ones. Start crocheting today and add a bit of handmade charm to your everyday essentials!


    SEO Title: Free Wheat Stitch Crochet Keychain Pattern

    Meta Description: Discover this charming Free Wheat Stitch crochet keychain pattern! Create a delightful accessory for yourself or as a special gift with this easy guide.

    URL Slug: wheat-stitch-keychain-pattern

    Primary Keyword: wheat stitch crochet keychain

    Secondary Keywords: free crochet keychain pattern, crochet keychain pattern, crochet accessories, handmade crochet keychain

    Image 1 Alt Text: A close-up of the crocheted wheat stitch keychain showcasing its textured design.

    Image 2 Alt Text: The completed crochet keychain attached to a bag as a stylish charm.

  • Free Crochet Keychain Pattern – A Cute Mini Cow Amigurumi You’ll Love

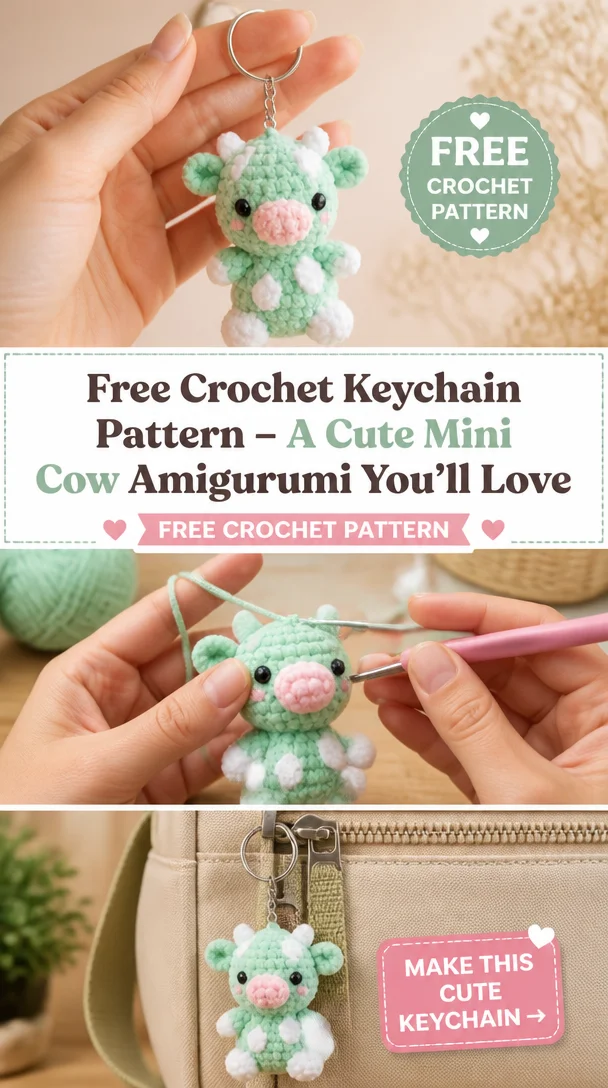
    Free Crochet Keychain Pattern – A Cute Mini Cow Amigurumi You’ll Love

    Adorable Mini Cow Amigurumi – Easy Crochet Keychain

    Looking for a quick and cute crochet project? The Adorable Mini Cow Amigurumi – Easy Crochet Keychain is the perfect choice! This small, soft keychain captures the playful essence of a cow with its embroidered eyes and realistic cow patches. It’s not just an eye-catching accessory; it’s a wonderful gift for friends and family or a charming addition to your own keyring. Crocheting this mini cow is an enjoyable experience that can be shared with fellow crafters of all skill levels, making it ideal for beginners and the more experienced alike. Plus, why stop at one? You can make a whole herd of these delightful mini cows in different colors!

    Crochet Keychain Pattern Overview

    • Skill Level: Beginner-friendly
    • Finished Size: Miniature cow keychain
    • Crochet Hook Size: (To be determined by the yarn)
    • Yarn Type: Acrylic or cotton yarn
    • Yarn Weight: Worsted weight (4)
    • Main Colors: White with black patches (customizable)
    • Construction Method: Worked in rounds
    • Approximate Completion Time: 1-2 hours
    • Keychain Attachment: Keychain ring

    Materials You’ll Need

    • Yarn (in desired colors)
    • Crochet hook (size to match yarn)
    • Keychain ring or clasp
    • Yarn needle
    • Stitch marker
    • Scissors
    • Embroidery thread for eyes

    Crochet Abbreviations

    • MR = magic ring
    • ch = chain
    • sc = single crochet
    • inc = increase
    • dec = decrease
    • st = stitch
    • rep = repeat

    Before You Start

    Before starting, make sure to work in continuous rounds to ensure a seamless finish for your mini cow. Using a stitch marker will help keep track of your rounds. Maintaining tight and even stitches is especially important for small projects to avoid visible stuffing later on. Remember to prepare your keychain ring or clasp ahead of time, so it’s ready for attachment when you finish your cow.

    Free Crochet Keychain Pattern

    Foundation or Magic Ring

    Start with a magic ring:

    Round 1: 6 sc into the ring.

    Main Body

    Round 2: Inc in each st around. (12)
    Round 3: 1 sc, inc around. (18)
    Round 4-7: Sc in each st around. (18)

    Head

    Round 8: 1 sc, dec around. (12)
    Round 9: Sc in each st around. (12)
    Stuff the head lightly.

    Ears

    Make 2:
    Round 1: 5 sc in a magic ring.

    Arms and Legs

    Make 2 for each:
    Round 1: 6 sc in a magic ring for arms and legs.
    Round 2: Sc in each st around. (6)

    Decorative Details

    Embroider the eyes using the embroidery thread. Add patches where desired.

    Joining the Pieces

    Sew the head, arms, and legs onto the body securely.

    Attaching the Keychain Ring

    Position the keychain ring at the top of the head before securing the last stitch of the head.

    Finishing the Keychain

    Weave in any loose ends and make adjustments to ensure all pieces are firmly attached.

    How to Use Your Crochet Keychain

    This adorable mini cow makes a fantastic keychain accessory, but it can also be used as a charming backpack charm or a delightful handbag decoration. It’s a perfect handmade gift for cow lovers or anyone who enjoys a pop of personality in their accessories.

    Tips for a Better Result

    • Maintain even tension when crocheting to ensure a uniform shape.
    • Position features symmetrically for an aesthetic appeal.
    • Secure all yarn ends before considering the project complete to prevent unraveling.

    Crochet Keychain Customization Ideas

    Feel free to personalize your mini cow by using different yarn colors or creating unique embroidered details. You can also experiment with various decorative bows and keychain hardware to match different styles or occasions.

    Common Problems and Troubleshooting

    • Uneven stitch counts: Count your stitches often to avoid discrepancies.
    • Visible stuffing: Ensure you stuff the animal evenly and with the right amount.
    • Loose stitches: Use a smaller hook if your stitches appear too loose.

    Care and Safety

    When caring for your handmade crochet keychain, check the yarn manufacturer’s cleaning instructions. Be mindful of small detachable parts, as they can pose a choking hazard if used by young children.

    Frequently Asked Questions

    1. Is this crochet keychain pattern beginner-friendly?
      Yes, it’s designed to be easy for beginners to follow.

    2. What yarn is best for crochet keychains?
      Worsted weight acrylic or cotton yarn is ideal for durability.

    3. How long does it take to crochet a keychain?
      Approximately 1-2 hours, depending on your skill level.

    4. Can I make this crochet keychain larger or smaller?
      Yes, you can adjust the yarn and hook size to change the dimensions.

    5. How do I attach a keychain ring?
      Position it at the top of the head before securing the last stitch.

    6. Can I use different yarn colors?
      Absolutely! Feel free to customize it to your liking.

    7. How do I keep the finished keychain in shape?
      Ensure all pieces are firmly attached and securely stuffed.

    Conclusion

    The Adorable Mini Cow Amigurumi – Easy Crochet Keychain is not only a delightful accessory but also a fun project that brings joy to both the maker and the recipient. Whether you’re adding it to your keyring or gifting it to a friend, this cute keychain is sure to bring smiles. Grab your materials and start crafting your own mini cow today!


    SEO Title: Adorable Mini Cow Amigurumi – Easy Crochet Keychain Pattern
    Meta Description: Create this cute mini cow amigurumi keychain with our easy crochet pattern! Perfect for gifts, markets, or your own keyring.
    URL Slug: adorable-mini-cow-amigurumi-keychain
    Primary Keyword: Adorable Mini Cow Amigurumi – Easy Crochet Keychain
    Secondary Keywords: crochet keychain pattern, amigurumi keychain pattern, easy crochet keychain, mini crochet keychain, DIY crochet keychain
    Image 1 Alt Text: Cute mini cow amigurumi crochet keychain
    Image 2 Alt Text: Detailed view of the crochet cow’s embroidered eyes and patches.

  • How to Make a Mini Octopus Keychain: Free Crochet Pattern

    How to Make a Mini Octopus Keychain: Free Crochet Pattern

    How to Make a Mini Octopus Keychain: Free Crochet Pattern

    Add a splash of ocean whimsy to your everyday accessories with this delightful Mini Octopus Keychain! Perfectly small and utterly charming, this crochet design features a tiny octopus that can serve as a keychain, bag charm, or even a thoughtful handmade gift for a friend. Its vibrant colors and adorable details make it an eye-catching accessory that will brighten any outfit. Whether you’re an experienced crocheter or a beginner looking to try your hand at something new, this pattern is easy to follow and fun to create. Dive into this free crochet keychain pattern and enjoy making your very own mini octopus!

    Crochet Keychain Pattern Overview

    • Skill Level: Beginner-friendly
    • Finished Size: Approximately 3 inches tall
    • Crochet Hook Size: 3.5 mm (E)
    • Yarn Type: Acrylic yarn
    • Yarn Weight: Light weight (3)
    • Main Colors: Pink and purple (or colors of your choice)
    • Construction Method: Worked in rounds
    • Approximate Completion Time: 1.5 hours
    • Type of Keychain Attachment: Keychain ring

    Materials You’ll Need

    • Yarn: Light weight acrylic yarn
    • Crochet Hook: Size 3.5 mm (E)
    • Keychain Ring or Clasp
    • Yarn Needle
    • Stitch Marker
    • Scissors
    • Polyester stuffing
    • Safety eyes (optional)
    • Embroidery thread for facial details (optional)

    Crochet Abbreviations

    • MR = magic ring
    • ch = chain
    • sc = single crochet
    • inc = increase
    • dec = decrease
    • sl st = slip stitch
    • st = stitch

    Before You Start

    Before diving into your crochet project, consider the following tips to ensure a smooth crafting experience:

    • Work in Continuous Rounds: This pattern is made in continuous rounds, so avoid joining at the end of each round unless specified.
    • Use a Stitch Marker: To keep track of your rounds, pin a stitch marker after the first stitch of each round.
    • Maintain Tight Stitches: Keeping your stitches tight will help avoid visible stuffing when you fill your octopus.
    • Plan Your Color Changes: If you want a multicolored design, decide in advance where your color changes will occur for a clean look.

    Free Crochet Keychain Pattern

    Foundation or Magic Ring

    Start by making a magic ring to create the base for your octopus.

    Round 1: 6 sc into the magic ring. Pull the ring to tighten (6 sts)
    Round 2: Inc in each st around (12 sts)
    Round 3: Sc in next st, inc in next repeat around (18 sts)
    Round 4: Sc in next 2 sts, inc in next repeat around (24 sts)

    Main Body

    Round 5-7: Sc in each st around (24 sts) – repeat for 3 rounds.
    Round 8: Sc in next 2 sts, dec repeat around (18 sts)
    Round 9: Sc in next st, dec repeat around (12 sts)
    Round 10: Dec around to close (6 sts)

    Attaching the Keychain Ring

    Before stuffing, use a yarn needle to thread the keychain ring onto the top of your octopus.

    Keychain Construction and Assembly

    After completing the main body, you can assemble the tentacles and add any decorative features:

    1. Tentacles (make 8):

      • Row 1: Ch 10.
      • Row 2: Sc in second ch from hook and down the chain. Finish off, leaving a long tail for sewing.
    2. Attach Tentacles: Sew each tentacle onto the base of the octopus using the tails left.

    3. Facial Features (optional): Use embroidery thread to create eyes and a smile, or sew on safety eyes if you prefer.

    Finishing Details

    Once assembled, weave in any loose ends securely and make sure all pieces are firmly attached. Give the keychain a light squeeze to ensure everything is in place.

    How to Use Your Crochet Keychain

    This mini octopus keychain can be used in many delightful ways:

    • As a keychain accessory for colorful keys
    • A charming bag or backpack charm
    • A thoughtful handmade gift for friends or family
    • A unique addition to your crochet souvenir collection

    Tips for a Better Result

    • Maintain Even Tension: Keeping consistent tension will make your stitches look neater and more uniform.
    • Avoid Visible Stuffing: Use just enough stuffing to shape your octopus while keeping its form smooth.
    • Secure Yarn Ends: Make sure to weave in all yarn ends to prevent any unraveling.

    Crochet Keychain Customization Ideas

    Feel free to personalize your mini octopus to match your style! Consider:

    • Experimenting with different yarn colors, like a vibrant blue or purple
    • Adding embellishments like bows or decorative stitches
    • Using different yarn types, like cotton for a different texture

    Common Problems and Troubleshooting

    If you run into any issues while crocheting, here are some solutions:

    • Uneven Stitch Counts: Double-check your stitch counts at the end of each round.
    • Loose Stitches: Tighten your tension if you notice gaps between stitches.
    • Crooked Facial Features: Take your time to align features symmetrically.

    Care and Safety

    To care for your handmade keychain, follow washing recommendations based on your yarn type. Avoid exposing it to harsh elements. Be cautious with small parts (like safety eyes) if giving to children.

    Frequently Asked Questions

    • Is this crochet keychain pattern beginner-friendly?
      Yes, it is designed for beginners with straightforward techniques.

    • What yarn is best for crochet keychains?
      Lightweight acrylic yarn is recommended for durability and color variety.

    • How long does it take to crochet a keychain?
      This mini octopus keychain takes approximately 1.5 hours.

    • Can I make this crochet keychain larger or smaller?
      Yes, consider using thicker yarn or a different hook size for adjustments.

    • How do I attach a keychain ring?
      Hook the ring through the top of the finished octopus and secure firmly.

    • Can I use different yarn colors?
      Absolutely! Feel free to experiment with your color palette.

    • How do I keep the finished keychain in shape?
      To maintain shape, ensure proper stuffing and use appropriate yarn tension.

    Conclusion

    We hope you enjoy making your very own Mini Octopus Keychain! Its playful design and versatility make it a delightful project for any crocheter. Not only is it a wonderful accessory, but also an enjoyable crafting experience that results in a cute and functional piece.


    SEO Title: Mini Octopus Keychain Crochet Pattern – Free Tutorial
    Meta Description: Create your own Mini Octopus Keychain with this easy crochet pattern! Perfect for beginners and a great gift idea for friends!
    URL Slug: mini-octopus-keychain-crochet-pattern
    Primary Keyword: mini octopus keychain
    Secondary Keywords: crochet keychain pattern, easy crochet keychain, amigurumi keychain pattern, DIY crochet keychain
    Image 1 Alt Text: Completed Mini Octopus Keychain in vibrant colors
    Image 2 Alt Text: Close-up of Mini Octopus Keychain showing detailed features

  • Amigurumi Seahorse Keychain

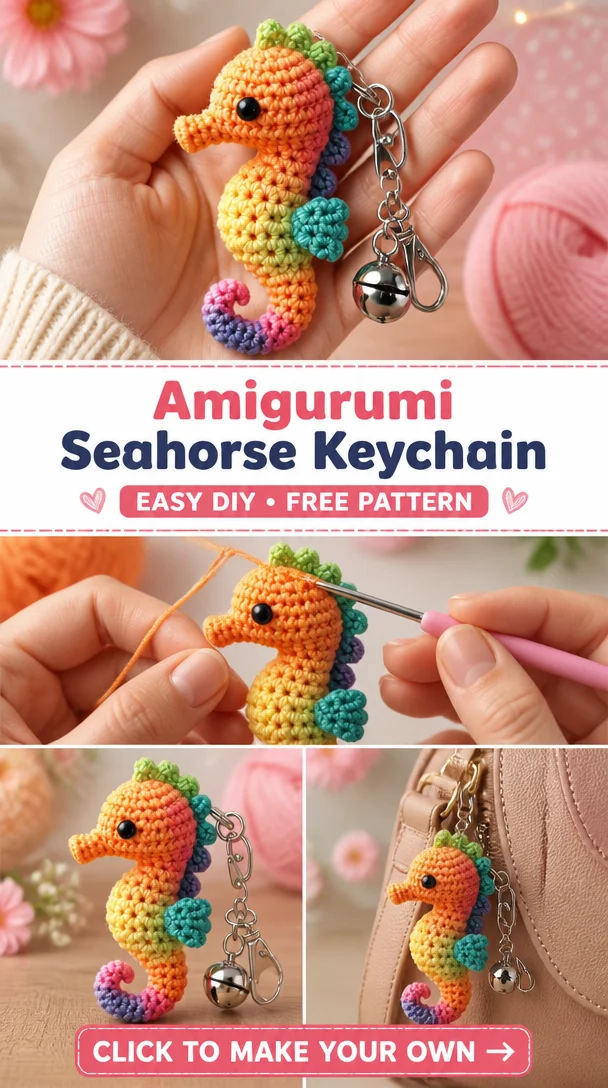
    Amigurumi Seahorse Keychain

    Amigurumi Seahorse Keychain

    Crafting an Amigurumi Seahorse Keychain adds a splash of creativity and charm to your everyday accessories. This delightful little keychain not only showcases a cute seahorse design but also provides an opportunity to express your unique style through color choices and personalization. Whether you’re looking for a functional item to hold your keys, a vibrant bag charm, or a heartfelt handmade gift, this seahorse keychain ticks all the boxes. With its intricate details and whimsical appeal, this pattern is perfect for both beginners and seasoned crocheters, making it an enjoyable project that anyone can tackle!

    Crochet Keychain Pattern Overview

    • Skill Level: Beginner to Intermediate
    • Finished Size: Approximately 4-5 inches long
    • Crochet Hook Size: G (4.0 mm)
    • Yarn Type: Cotton or Acrylic
    • Yarn Weight: Sport or DK weight
    • Main Colors: Any color of your choice for the seahorse
    • Construction Method: Worked in rounds
    • Approximate Completion Time: 2-4 hours
    • Beginner-Friendly: Yes
    • Type of Keychain Attachment: Keychain ring or clasp

    Materials You’ll Need

    • Yarn in desired colors
    • G (4.0 mm) crochet hook
    • Keychain ring or clasp
    • Yarn needle
    • Stitch marker
    • Scissors
    • Stuffing (if needed)
    • Safety eyes (optional)
    • Embroidery thread (optional for details)

    Crochet Abbreviations

    • MR = magic ring
    • ch = chain
    • sc = single crochet
    • inc = increase
    • dec = decrease
    • st = stitch
    • rep = repeat

    Before You Start

    Before diving into your crochet project, here are some handy tips:

    • Working in Continuous Rounds: This pattern uses continuous rounds, meaning you will not join at the end of each round. Instead, use a stitch marker to keep track of your starting point.
    • Using a Stitch Marker: Place it in your first stitch of each round to help monitor your progress.
    • Maintaining Tight, Even Stitches: Be mindful of your tension to avoid gaps, especially since this keychain is small.
    • Stuffing Small Crochet Pieces: If your seahorse needs stuffing, add it gradually as you crochet.

    Free Crochet Keychain Pattern

    Foundation or Magic Ring

    Round 1: Create a magic ring, and work 6 sc into the ring. (6 sts)

    Main Body

    Round 2: Inc in each st around. (12 sts)

    Round 3: Sc in next st, inc in next st – repeat around. (18 sts)

    Round 4: Sc in next 2 sts, inc in next st – repeat around. (24 sts)

    Round 5-10: Sc in each st around for 6 rounds. (24 sts each round)

    Round 11: Sc in next 2 sts, dec – repeat around. (18 sts)

    Round 12: Sc in next st, dec – repeat around. (12 sts)

    Head

    Round 13: Sc in each st around. (12 sts)

    Round 14: Sc in next st, dec – repeat around. (8 sts)

    Finish and leave a long tail for sewing.

    Ears

    Make 2:

    Row 1: Ch 4, sc in 2nd ch from hook, sc in next 2 ch.

    Row 2: Ch 1, turn, sc2tog, sc.

    Finish and leave a tail for sewing.

    Joining the Pieces

    • Sew the ears to the top of the head.
    • Attach safety eyes if desired, positioning them appropriately.

    Attaching the Keychain Ring

    • Using the remaining tail from the main body, position the keychain ring at the top of the head.
    • Secure the ring firmly, ensuring it can hold the keychain’s weight.

    Finishing Details

    Embroider any additional details, such as facial features or decorative accents, to enhance the seahorse’s charming look. Secure all yarn ends to prevent unraveling.

    How to Use Your Crochet Keychain

    Your Amigurumi Seahorse Keychain can serve various purposes:

    • As a unique keychain accessory
    • A fun backpack charm
    • A decorative addition to handbags
    • A thoughtful handmade gift for friends and family
    • A personalized décor piece for your own belongings

    Tips for a Better Result

    • Maintain even tension throughout your work.
    • Keep your stitches neat to enhance the final appearance.
    • Make sure to show care during color changes to avoid visible overlaps.
    • Carefully attach the hardware to ensure it stays secure.

    Crochet Keychain Customization Ideas

    To make your seahorse keychain even more special, consider these customization options:

    • Experiment with different yarn colors for a unique look.
    • Add embroidered details or embellishments.
    • Use different yarn types for texture variations.
    • Personalize it with a special charm attached to the keychain.

    Common Problems and Troubleshooting

    Here are some common issues you might encounter and how to solve them:

    • Uneven Stitch Counts: Regularly check your stitch count each round.
    • Visible Stuffing: Ensure you stuff evenly and avoid overstuffing.
    • Misaligned Pieces: Use a good pinning technique during assembly to keep everything in line.

    Care and Safety

    To care for your handmade crochet keychain, follow the yarn manufacturer’s cleaning instructions. Be cautious with small detachable parts and metal rings; they may not be suitable for very young children.

    Frequently Asked Questions

    • Is this crochet keychain pattern beginner-friendly?

      • Yes, it is suitable for both beginners and more experienced crocheters.
    • What yarn is best for crochet keychains?

      • Cotton or acrylic yarn works well for durability and aesthetics.
    • How long does it take to crochet a keychain?

      • The project typically takes about 2-4 hours to complete.
    • Can I make this crochet keychain larger or smaller?

      • Yes, you can adjust the hook size and yarn weight for different sizes.
    • How do I attach a keychain ring?

      • Position the ring at the top during the final assembly, securing it with yarn.

    Conclusion

    Creating your Amigurumi Seahorse Keychain is a rewarding and enjoyable project. With its adorable design and easy-to-follow pattern, you’ll have a lovely accessory that reflects your crochet skills and creativity. So gather your materials, and let’s get crocheting!


    SEO Title: Adorable Amigurumi Seahorse Keychain Pattern
    Meta Description: Learn to crochet a colorful Amigurumi Seahorse Keychain with this easy pattern! Perfect for gifts and as a charming accessory.
    URL Slug: amigurumi-seahorse-keychain
    Primary Keyword: Amigurumi Seahorse Keychain
    Secondary Keywords: free crochet keychain pattern, easy crochet keychain, crochet keychain for beginners, crochet animal keychain
    Image 1 Alt Text: Colorful handmade Amigurumi Seahorse Keychain displayed on a table.
    Image 2 Alt Text: Close-up of an Amigurumi Seahorse Keychain with a keyring attachment.

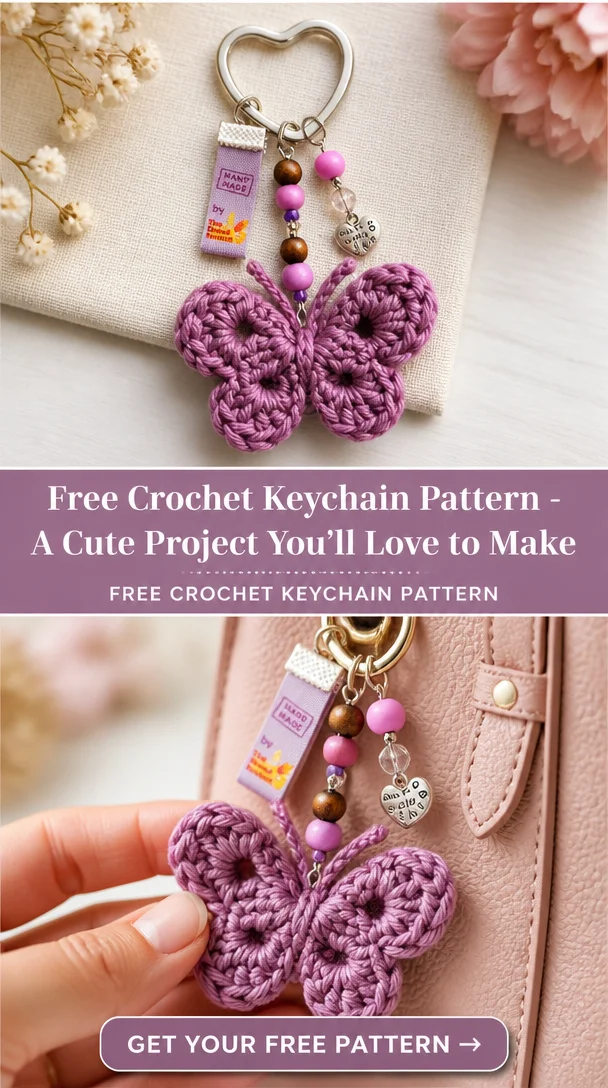
  • Free Crochet Keychain Pattern – A Cute Project You’ll Love to Make

    Free Crochet Keychain Pattern – A Cute Project You’ll Love to Make

    Cute and Fun Keychain Crochet Patterns Free

    Looking for a charming addition to your accessory collection? Our Cute and Fun Keychain Crochet Patterns offer delightful designs that make ideal keychains, bag charms, or handmade gifts. These miniature crochet creations, featuring adorable shapes like animals, flowers, and fruits, add a personal touch to your belongings. Not only are these keychains cute and eye-catching, but they’re also a fantastic way to showcase your crochet skills. With a range of designs suitable for beginners and experienced crafters alike, you’ll find a pattern that resonates with your style while making the perfect, unique gift for friends and family.

    Crochet Keychain Pattern Overview

    • Skill Level: Beginner
    • Finished Size: Approximately 3-4 inches
    • Crochet Hook Size: G/4.0 mm
    • Yarn Type: Cotton or acrylic yarn
    • Yarn Weight: Worsted weight (Medium)
    • Main Colors: Your choice (various colors suggested)
    • Construction Method: Worked in rounds
    • Approximate Completion Time: 1-2 hours
    • Project Style: Easy crochet keychain
    • Type of Keychain Attachment: Keychain ring or clasp

    Materials You’ll Need

    • Yarn (in various colors)
    • Crochet hook (size G/4.0 mm)
    • Keychain ring or clasp
    • Yarn needle
    • Stitch marker
    • Scissors
    • Stuffing (if necessary)
    • Safety eyes (if specified)
    • Embroidery thread (if needed)
    • Additional decorative elements (such as beads or felt)

    Crochet Abbreviations

    • MR = magic ring
    • ch = chain
    • sc = single crochet
    • hdc = half double crochet
    • dc = double crochet
    • sl st = slip stitch
    • inc = increase
    • dec = decrease
    • st = stitch
    • rep = repeat

    Before You Start

    Before diving into your crochet keychain project, consider these practical tips:

    • Work in Continuous Rounds: This technique helps in keeping your work seamless, especially in small projects.
    • Use a Stitch Marker: It’s helpful for keeping track of your rounds, ensuring consistent progress.
    • Maintain Tight, Even Stitches: This ensures a neat finish, especially important for smaller pieces.
    • Plan for Color Changes: If you are using multiple colors, prepare where you will change colors for the best visual effect.

    Free Crochet Keychain Pattern

    Foundation or Magic Ring

    Round 1: Create a magic ring, then work 6 sc into the ring.

    Round 2: Inc in each st around (12 sts).

    Round 3: Sc in the next st, inc around (18 sts).

    Main Body

    Rounds 4-6: Sc in each st around (18 sts).

    Attaching the Keychain Ring

    Once your main body is complete, position your keychain ring at the top of the crochet piece. Secure it by stitching a few rounds of the top edge to the ring, ensuring a sturdy hold.

    Finishing Details

    1. Embroidered Features: Add safety eyes or embroider facial features to bring your keychain to life.
    2. Decorative Stitching: Add any embellishments, like stitches or beads, to enhance the look.
    3. Final Shaping: Gently shape your piece, ensuring the overall silhouette is neat and appealing.

    How to Use Your Crochet Keychain

    Your new crochet keychain can serve multiple purposes:

    • Use it as a keychain to keep your keys organized.
    • Clip it onto your backpack as a charming charm.
    • Hang it from your handbag to give it a personalized touch.
    • Gift it to a friend as a unique and heartfelt handmade surprise.

    Tips for a Better Result

    • Maintain even tension throughout your work for a polished finish.
    • Work carefully with small pieces to avoid visible stuffing.
    • Make clean color changes by ensuring your yarn is well-positioned.
    • Secure yarn ends to prevent unraveling during use.

    Crochet Keychain Customization Ideas

    Personalize your crochet keychain by considering these options:

    • Experiment with different yarn colors to match your own style.
    • Add embroidered details or small accessories for a unique twist.
    • Use different keychain hardware, such as clips or different styles of rings.

    Common Problems and Troubleshooting

    Here are a few common issues to keep an eye on:

    • Uneven Stitch Counts: Double-check your rounds for accuracy.
    • Loose Stitches: Maintain tighter tension if your stitches are too loose.
    • Visible Stuffing: Work the stuffing in gradually and distribute evenly to hide it from view.

    Care and Safety

    When caring for your crochet keychain, consider the manufacturer’s washing instructions based on your yarn type. For removable parts, ensure no choking hazards are present if your keychain includes small embellishments.

    Frequently Asked Questions

    • Is this crochet keychain pattern beginner-friendly?
      Yes, the pattern is designed for beginners with simple stitches.

    • What yarn is best for crochet keychains?
      A medium weight (worsted) cotton or acrylic yarn is ideal for durability and ease of use.

    • How long does it take to crochet a keychain?
      Most keychains can be completed in 1-2 hours, depending on your skill level.

    • Can I make this crochet keychain larger or smaller?
      Yes, you can adjust the hook size and yarn weight for different sizes.

    • How do I attach a keychain ring?
      Position the ring at the top and stitch securely to ensure it holds.

    • Can I use different yarn colors?
      Absolutely! Feel free to mix and match colors for a personalized touch.

    • How do I keep the finished keychain in shape?
      Ensure tight stitches and stuffed evenly for a nice shape.

    Conclusion

    Creating a crochet keychain is a fun and rewarding project that allows for creativity and customization. Whether you opt for an animal, flower, or fruit design, each keychain serves as a delightful accessory or a thoughtful gift. Dive into your crochet journey and enjoy making these cute and fun keychains!


    SEO Title: Cute and Fun Crochet Keychain Patterns Free

    Meta Description: Discover adorable, beginner-friendly crochet keychain patterns! Perfect for bags or as gifts, explore our free designs today.

    URL Slug: cute-fun-crochet-keychain-patterns-free

    Primary Keyword: Cute and Fun Keychain Crochet Patterns Free

    Secondary Keywords: free crochet keychain pattern, easy crochet keychain, crochet keychain for beginners, amigurumi keychain pattern, DIY crochet keychain

    Image 1 Alt Text: Adorable finished crochet keychain showcasing vibrant colors

    Image 2 Alt Text: Detailed close-up of crochet animal keychain with eyes and features

  • Crochet Octopus Keychain | Jen Hayes Creations

    Crochet Octopus Keychain | Jen Hayes Creations

    Crochet Octopus Keychain | Jen Hayes Creations

    Introducing the adorable Crochet Octopus Keychain from Jen Hayes Creations, a delightful project that’s sure to charm anyone who sees it! With its whimsical design and compact size, this keychain is not only adorable in any color but also incredibly quick to make, making it perfect for both seasoned crafters and beginners alike. This little octopus can be used as a functional keychain, a cute bag charm, or even as a handmade gift for friends and family. Simplistic yet captivating, it’s an excellent way to showcase your love for crochet while creating something unique.

    Crochet Keychain Pattern Overview

    • Skill Level: Beginner
    • Finished Size: Miniature keychain size
    • Crochet Hook Size: Standard (not specified in the source)
    • Yarn Type: Any lightweight yarn
    • Yarn Weight: Lightweight
    • Main Colors: Any (your choice)
    • Construction Method: Worked in rounds
    • Approximate Completion Time: Quick
    • Beginner-Friendly: Yes
    • Worked In: Rounds
    • Keychain Attachment: Keychain ring or clasp

    Materials You’ll Need

    • Lightweight yarn
    • A suitable crochet hook
    • Keychain ring or clasp
    • Yarn needle
    • Stitch marker
    • Scissors
    • Stuffing (if required)

    Crochet Abbreviations

    • MR = magic ring
    • ch = chain
    • sc = single crochet
    • sl st = slip stitch

    Before You Start

    Before diving in, take a moment to familiarize yourself with working in continuous rounds. Using a stitch marker can help you keep track of your rounds, ensuring you maintain tight, even stitches. Plan your color changes as needed, and prepare the keychain ring to attach at the end of the project. Having these basics understood will help make your crocheting experience smoother.

    Free Crochet Keychain Pattern

    Foundation or Magic Ring

    Start with a magic ring to create a secure center for your octopus.

    Main Body

    Round 1: Work several single crochets into the magic ring to form the body.

    Head

    Round 2: Increase your stitch count to shape the head of the octopus.

    Arms and Legs

    Round 3: Create the octopus’s legs by working in separate sections or extending from the body directly.

    Attaching the Keychain Ring

    Once your octopus is complete, attach the keychain ring securely to the top for easy attachment.

    Finishing the Keychain

    Final touches may include embroidering eyes or additional decorative stitching to make your octopus extra charming.

    Keychain Construction and Assembly

    Begin by ensuring all the pieces are securely joined. If you have made separate arms, attach them to the main body with a needle and yarn, making sure they are evenly spaced. Add any facial features prior to securing all yarn ends to give it a polished finish.

    Attaching the Keychain Ring or Clasp

    Position the keychain ring at the top of the octopus. Secure it by stitching through the top loop of your final stitch. Make sure it is tight and the octopus can be securely attached to your keys or bag.

    Finishing Details

    For a polished look, embroidered eyes can really give your octopus character. Shape the arms so they fan out slightly, ensuring uniformity for an aesthetically pleasing finish.

    How to Use Your Crochet Keychain

    Your finished crochet octopus keychain can serve multiple purposes:

    • Accessorizing your keys
    • Decorating a backpack
    • Brightening up your handbag
    • Making a heartfelt handmade gift
    • Serving as a fun crochet souvenir

    Tips for a Better Result

    • Maintain consistent tension throughout your stitches for an even look.
    • Be mindful of spacing when attaching characters and decorations.
    • Secure your yarn ends well to prevent unraveling.

    Crochet Keychain Customization Ideas

    Feel free to add your personal touch with:

    • Custom yarn colors
    • Decorative bows or accessories
    • Different yarn weights for varied textures

    Common Problems and Troubleshooting

    • Uneven Stitch Counts: Keep track of stiches at each round with a marker.
    • Visible Stuffing: Ensure that stuffing is not protruding through any stitches by maintaining tight tension.

    Care and Safety

    To care for your crochet keychain, simply check cleaning methods according to the yarn recommendations. Remember to keep an eye on removable parts, especially with small children around.

    Frequently Asked Questions

    • Is this crochet keychain pattern beginner-friendly?
      Yes, it is perfect for beginners!

    • What yarn is best for crochet keychains?
      A lightweight yarn works best.

    • Can I make this crochet keychain larger or smaller?
      Adjustments can be made based on your yarn and hook choices.

    • How do I attach a keychain ring?
      Stitch through the top loop securely for a stable hold.

    • Can I use different yarn colors?
      Absolutely, feel free to mix and match colors.

    Conclusion

    The Crochet Octopus Keychain is not only an enjoyable project to make but also a functional accessory that brings joy as a gift or personal piece. With its simple design and quick construction, it’s an ideal project for any crocheter looking for a fun experience.


    SEO Title: Adorable Crochet Octopus Keychain Pattern

    Meta Description: Discover how to crochet an adorable octopus keychain. This beginner-friendly pattern is quick to make and perfect for gifts or bag charms!

    URL Slug: crochet-octopus-keychain

    Primary Keyword: crochet octopus keychain

    Secondary Keywords: free crochet keychain pattern, crochet keychain tutorial, easy crochet keychain

    Image 1 Alt Text: An adorable completed crochet octopus keychain in vibrant color.

    Image 2 Alt Text: Step-by-step crochet instructions for the octopus keychain.

  • Crochet Sunflower Keychain | Free Pattern | Crochet sunflower keychain tutorial, Diy sunflower keychain, Free crochet pattern

    Crochet Sunflower Keychain | Free Pattern | Crochet sunflower keychain tutorial, Diy sunflower keychain, Free crochet pattern

    Crochet Sunflower Keychain | Free Pattern | Crochet sunflower keychain tutorial, Diy sunflower keychain, Free crochet pattern

    If you’re looking for a delightful and practical project, the Crochet Sunflower Keychain is the perfect choice! This charming keychain features a vibrant sunflower design that is both cute and eye-catching. It’s an excellent way to showcase your crochet skills and add a touch of cheer to your everyday items. Not only does this crochet keychain serve as a practical accessory for your keys, but it can also be used as a charming bag charm or a thoughtful handmade gift for friends or loved ones. Suitable for crocheters of all skill levels, this quick and enjoyable project is sure to bring a smile to anyone who sees it!

    Crochet Keychain Pattern Overview

    • Skill Level: Beginner to Intermediate
    • Finished Size: Approximately 3 inches in diameter
    • Crochet Hook Size: G/4.0 mm
    • Yarn Type: 100% Cotton
    • Yarn Weight: Worsted weight
    • Main Colors: Yellow, brown, green
    • Construction Method: Worked in rounds
    • Approximate Completion Time: 1-2 hours
    • Project Type: Beginner-friendly
    • Keychain Attachment: Metal keychain ring

    Materials You’ll Need

    • Yellow yarn
    • Brown yarn
    • Green yarn
    • Crochet hook (G/4.0 mm)
    • Keychain ring or clasp
    • Yarn needle
    • Stitch marker
    • Scissors

    Crochet Abbreviations

    • MR = magic ring
    • ch = chain
    • sc = single crochet
    • hdc = half double crochet
    • dc = double crochet
    • sl st = slip stitch
    • inc = increase
    • dec = decrease
    • st = stitch
    • rep = repeat

    Before You Start

    Before you begin crocheting your sunflower keychain, it’s essential to understand a few key techniques and tips. First, you’ll be working in continuous rounds, which means there won’t be any turning chains to mark the start of a new round. Use a stitch marker to help keep track of your rounds. Maintaining even tension is crucial, especially when working with small pieces. Additionally, plan your color changes carefully, particularly for the petals and the center of the sunflower, to achieve a seamless look.

    Free Crochet Keychain Pattern

    Foundation or Magic Ring

    1. Create a magic ring.
    2. Round 1: Ch 2, 10 sc in the ring. Pull the ring tight and sl st to the first sc to join. (10 sts)

    Petals

    1. Round 2: Ch 2, *(dc, ch 1) in the next st; repeat from * around. Sl st to the top of the first dc to join. (10 petals)
    2. Round 3: Sc in each ch-1 space around. (10 sc)

    Centers

    1. Round 4: Switch to brown yarn. Ch 2, 15 hdc in the same st. Sl st to the first hdc to join. (15 hdc)
    2. Round 5: Sc in each hdc around. (15 sc)

    Leaves

    1. Using green yarn, make 2 leaves:
      • Ch 8, sc in 2nd ch from hook, hdc in next ch, dc in next 3 ch, hdc in next ch, sc in last ch. Fasten off and leave a long tail for sewing.

    Joining the Pieces

    1. Position the brown center in the middle of your petal section.
    2. Sew the center securely onto the petals.
    3. Attach leaves on either side of the sunflower with your yarn needle.

    Attaching the Keychain Ring or Clasp

    To attach the keychain ring, use the long tail you left from the first round of the sunflower. Securely stitch the keychain ring to the top of the sunflower, ensuring it is tightly fastened and secured against any pulling.

    Finishing Details

    For a polished finish, weave in any loose yarn ends and ensure all pieces are tightly stitched together. You may also want to shape the flower petals slightly to give them a lively appearance. Feel free to add any embroidered details to enhance the center of the flower for a customized touch.

    How to Use Your Crochet Keychain

    This Crochet Sunflower Keychain is versatile! You can use it as a cute keychain accessory, a backpack charm, or a lovely handbag decoration. It also makes an excellent handmade gift or a sweet souvenir representing your love for crochet.

    Tips for a Better Result

    • Maintain even tension to ensure a consistent look.
    • Keep your stitches neat to avoid gaps.
    • Use small-scale stuffing sparingly for a fuller appearance.
    • Make clean transitions when changing yarn colors.
    • Ensure that your leaves are symmetrical and securely attached.

    Crochet Keychain Customization Ideas

    • Experiment with different yarn colors to make your sunflower unique.
    • Incorporate decorative bows or buttons for added flair.
    • Adjust the size to create larger or smaller keychains according to preference.
    • Try different shapes or flowers using the same construction methods.

    Common Problems and Troubleshooting

    • Uneven stitch counts: Count your stitches regularly.
    • Loose stitches: Maintain consistent tension throughout your work.
    • Visible stuffing: Use minimal stuffing and ensure it’s evenly distributed.
    • Crooked features: Take your time to position elements symmetrically during assembly.

    Care and Safety

    To care for your crochet keychain, follow the yarn manufacturer’s cleaning instructions. Be mindful of small detachable parts or metal rings, which may pose a choking hazard for young children.

    Frequently Asked Questions

    • Is this crochet keychain pattern beginner-friendly?
      Yes, this pattern is designed for beginners and can be completed quickly.

    • What yarn is best for crochet keychains?
      A medium-weight cotton yarn works well for durability and visual appeal.

    • How long does it take to crochet a keychain?
      Approximately 1-2 hours, depending on your experience level.

    • Can I make this crochet keychain larger or smaller?
      Yes, you can adjust the size by using different yarn weights or changing your hook size.

    • How do I attach a keychain ring?
      Securely stitch the ring to the top of your finished piece.

    • Can I use different yarn colors?
      Absolutely! Customize your sunflower with colors of your choice.

    • How do I keep the finished keychain in shape?
      Ensure all pieces are tightly stitched and consider using a light stuffing.

    • Can I use this crochet keychain as a bag charm?
      Yes, it makes a lovely addition to bags or backpacks!

    Conclusion

    The Crochet Sunflower Keychain is a fantastic way to express your creativity while making a functional accessory. Its cheerful design brightens up any day, and it’s perfect for gifting or adding to your crochet collection. Grab your materials and start crocheting this delightful sunflower keychain today!


    SEO Title: Free Crochet Sunflower Keychain Pattern
    Meta Description: Brighten your keys with this free crochet sunflower keychain pattern! Easy to follow and perfect for beginners, create a charming accessory or gift today!
    URL Slug: crochet-sunflower-keychain-pattern
    Primary Keyword: crochet sunflower keychain pattern
    Secondary Keywords: free crochet keychain pattern, crochet keychain tutorial, DIY crochet keychain, amigurumi keychain pattern, crochet flower keychain
    Image 1 Alt Text: Handmade crochet sunflower keychain in vibrant colors attached to keys.
    Image 2 Alt Text: Close-up of the crochet sunflower keychain displaying detailed petals and center.

Ruby’s Crochet Keychains

Your free crochet ebook

Leave your email address to request your free crochet ebook.

Join Our Community

Your email address will be used to handle your ebook request.Privacy policy