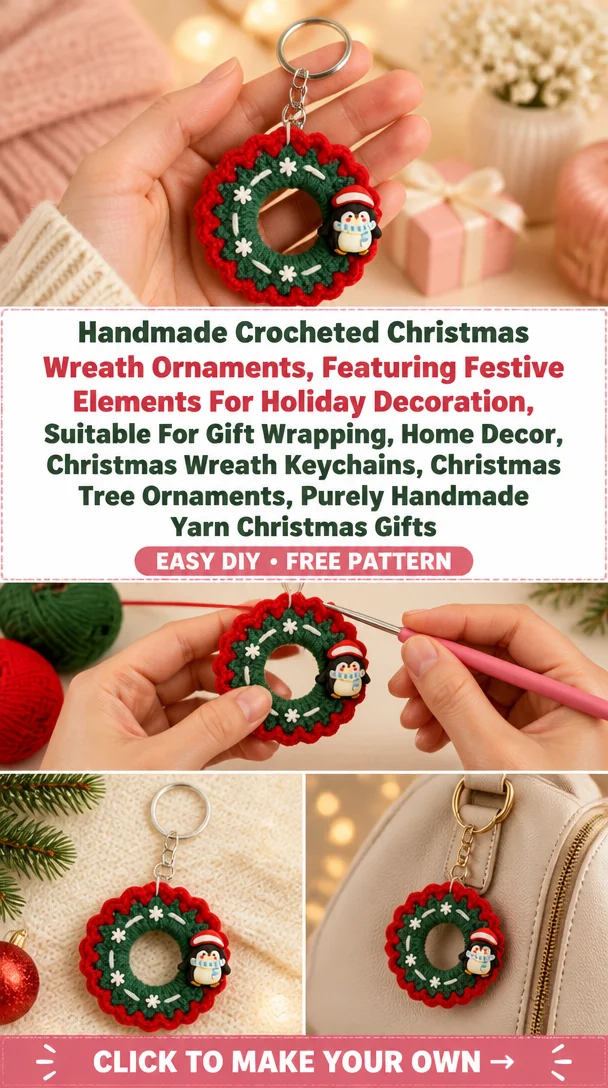
Tag: Holiday Decor

  • Handmade Crocheted Christmas Wreath Ornaments, Featuring Festive Elements For Holiday Decoration, Suitable For Gift Wrapping, Home Decor, Christmas Wreath Keychains, Christmas Tree Ornaments, Purely Handmade Yarn Christmas Gifts

    Handmade Crocheted Christmas Wreath Ornaments, Featuring Festive Elements For Holiday Decoration, Suitable For Gift Wrapping, Home Decor, Christmas Wreath Keychains, Christmas Tree Ornaments, Purely Handmade Yarn Christmas Gifts

    Handmade Crocheted Christmas Wreath Ornaments

    Creating handmade crochet keychains can bring a delightful touch to your festive decorations or serve as cherished gifts. This particular crochet pattern features a charming Christmas wreath ornament, designed to be not just a visual treat but a practical accessory as well. Its circular shape adorned with festive colors makes it an eye-catching addition to bags, keys, or even as part of your holiday décor. Whether you’re looking to spruce up your holiday gifts or simply want a unique piece to showcase your crochet skills, this easy crochet pattern is suitable for all skill levels, making it perfect for both beginners and seasoned crocheters alike.

    Crochet Keychain Pattern Overview

    • Skill Level: Beginner to Intermediate
    • Finished Size: Approximately 4 inches in diameter
    • Crochet Hook Size: G/4.0mm
    • Yarn Type: 100% Polyester
    • Yarn Weight: Worsted weight (medium)
    • Main Colors: Red, green, white, and gold
    • Construction Method: Worked in rounds
    • Approximate Completion Time: 1-2 hours
    • Type of Keychain Attachment: Keychain ring or clasp

    Materials You’ll Need

    • 100% Polyester yarn in red, green, white, and gold
    • G/4.0mm crochet hook
    • Keychain ring or clasp
    • Yarn needle
    • Stitch marker
    • Scissors
    • Optional: Small embellishments (like beads or faux berries)

    Crochet Abbreviations

    • MR = magic ring
    • ch = chain
    • sc = single crochet
    • hdc = half double crochet
    • dc = double crochet
    • sl st = slip stitch
    • inc = increase

    Before You Start

    Before you dive into crocheting your Christmas wreath keychain, make sure to prepare your materials. Use a stitch marker to keep track of your rounds, especially since you’ll be working in continuous rounds. Maintaining tight, even stitches is crucial to ensure your keychain holds its shape. Plan any color changes in advance if you’re using multiple colors in your wreath.

    Free Crochet Keychain Pattern

    Foundation or Magic Ring

    1. Start with a magic ring.
    2. Round 1: Ch 1, and work 10 sc into the ring. Pull the ring tight and join with a sl st to the first sc.

    Main Body

    1. Round 2: Ch 1, inc in each st around (20 sc). Join.
    2. Round 3: Ch 1, sc in next st, inc in next st; repeat around (30 sc). Join.
    3. Round 4: Ch 1, sc in each of the next 10 sts, inc in next st; repeat around (33 sc). Join.

    Decorative Details

    1. Round 5: Change to green yarn. Ch 1, sc in each sc around. Join.
    2. Round 6: With white yarn, ch 1, sc in each of the next 15 sts, hdc in next st; repeat around. Join.
    3. Attach gold yarn for the accent. Ch 1, sl st around in every third stitch, join and fasten off.

    Keychain Construction and Assembly

    To assemble your wreath ornament, start by weaving in all the yarn ends to ensure a clean look. Position the keychain ring at the top of the wreath, making sure it’s securely attached. You can also embellish your wreath with small faux berries or bows to give it a festive touch.

    Attaching the Keychain Ring or Clasp

    To attach the keychain ring, locate the top of the wreath where you want the ring to be placed. Use your yarn needle to sew a tight stitch through the last round of the wreath, and then loop the keychain ring through. Secure this with a few extra stitches to ensure it won’t come loose.

    Finishing Details

    To add the final touches, consider embroidering small facial features or decorative stitches onto the wreath. Ensure all yarn ends are secured, trimming any excess after knotting thoroughly.

    How to Use Your Crochet Keychain

    This charming Christmas wreath keychain can serve multiple purposes, including:

    • As a holiday-themed accessory for your keys
    • A delightful bag charm
    • A meaningful handmade gift for friends and family
    • A cute decorative piece for your holiday tree

    Tips for a Better Result

    • Maintain even tension to ensure your wreath keeps its shape.
    • Work with small pieces carefully to avoid visible stuffing.
    • Position decorative details symmetrically for a polished finish.

    Crochet Keychain Customization Ideas

    Feel free to get creative! You can customize your wreath by using different yarn colors or adding personalized embellishments. Experiment with combinations and sizes according to your preference.

    Common Problems and Troubleshooting

    • Uneven stitch counts can happen; always count your stitches at the end of each round.
    • To avoid visible stuffing, use a smaller amount and distribute it evenly if stuffing is used.
    • If keychain attachments feel loose, reinforce them by resewing after completion.

    Care and Safety

    For care, clean your crochet keychain according to the yarn manufacturer’s instructions, typically hand wash with mild soap. Between small parts and hooks, ensure the keychain is not suitable for infants or very young children without supervision.

    Frequently Asked Questions

    • Is this crochet keychain pattern beginner-friendly?
      Yes, it is designed for beginners and has simple techniques involved.

    • What yarn is best for crochet keychains?
      A worsted weight (medium) yarn, like 100% polyester, works best for durability.

    • How long does it take to crochet a keychain?
      It typically takes 1-2 hours, depending on your experience.

    • Can I make this crochet keychain larger or smaller?
      Yes, you can adjust the number of rounds or the yarn used to change the size.

    • How do I attach a keychain ring?
      Sew the ring securely on top of your completed keychain.

    Conclusion

    Crocheting a handmade Christmas wreath keychain is a fulfilling project that brings joy and creativity to your holiday season. With its charming design, this keychain also serves as a fantastic gift for your loved ones. Dive into this pattern, and you’ll create beautiful pieces that truly embody the spirit of the holidays!


    SEO Title: Crochet Christmas Wreath Keychain Pattern
    Meta Description: Create a charming handmade crochet Christmas wreath keychain with our easy pattern. Perfect for gifts and festive decor!
    URL Slug: crochet-christmas-wreath-keychain
    Primary Keyword: crochet Christmas wreath keychain
    Secondary Keywords: free crochet keychain pattern, Christmas wreath keychain, easy crochet keychain
    Image 1 Alt Text: Handmade crochet Christmas wreath keychain in festive colors.
    Image 2 Alt Text: Close-up of a finished crochet Christmas wreath keychain.
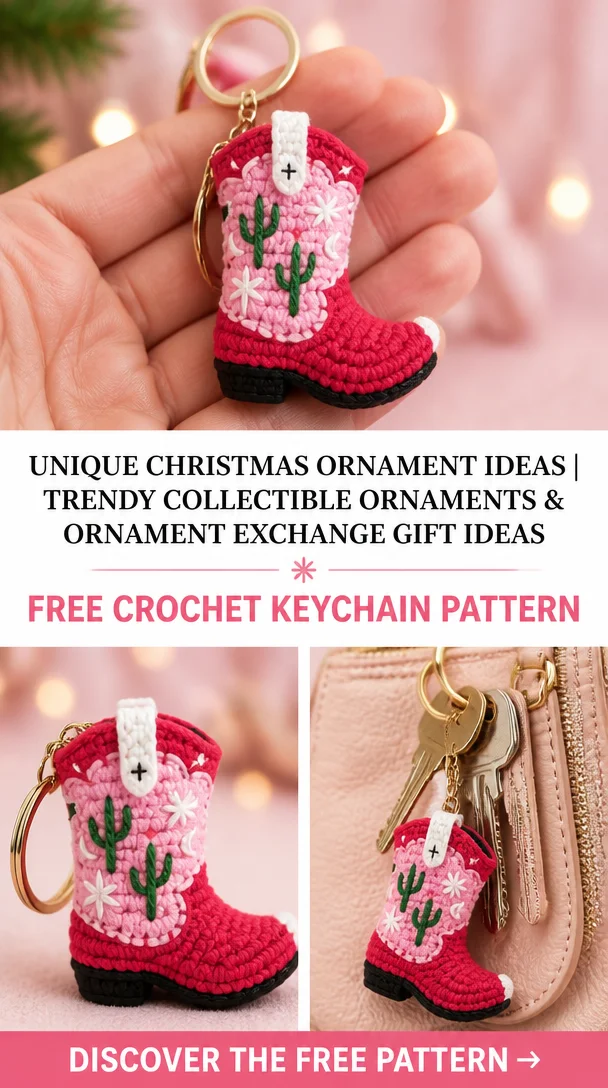
  • Unique Christmas Ornament Ideas | Trendy Collectible Ornaments & Ornament Exchange Gift Ideas

    Unique Christmas Ornament Ideas | Trendy Collectible Ornaments & Ornament Exchange Gift Ideas

    Unique Christmas Ornament Ideas | Trendy Collectible Ornaments & Ornament Exchange Gift Ideas

    Crocheting your own keychain can be a delightful way to express your creativity while creating a unique accessory. This adorable crochet keychain design serves as both a functional item and a meaningful keepsake. Whether you want to add a touch of charm to your bag or gift it to a loved one, this keychain is sure to bring smiles. With its playful shape and vibrant colors, it becomes a miniature work of art that tells a story, much like the collectible Christmas ornaments that adorn our trees. Suitable for both beginners and experienced crocheters, this project offers a wonderful opportunity to explore your crochet skills while crafting something truly special.

    Crochet Keychain Pattern Overview

    • Skill Level: Beginner-friendly
    • Finished Size: Approximately 3-4 inches
    • Crochet Hook Size: 3.5 mm (E)
    • Yarn Type: Cotton or acrylic
    • Yarn Weight: Worsted weight (Medium 4)
    • Main Colors: Choose your favorite seasonal colors
    • Construction Method: Worked in continuous rounds
    • Approximate Completion Time: 1-2 hours
    • Keychain Attachment: Metal keychain ring

    Materials You’ll Need

    • Yarn in your chosen colors
    • 3.5 mm (E) crochet hook
    • Metal keychain ring or clasp
    • Yarn needle
    • Stitch marker
    • Scissors
    • Stuffing (optional, if making a plush version)
    • Safety eyes (if applicable for animal designs)
    • Embroidery thread for additional details

    Crochet Abbreviations

    • MR = Magic Ring
    • ch = Chain
    • sc = Single Crochet
    • inc = Increase
    • dec = Decrease
    • st = Stitch
    • rep = Repeat

    Before You Start

    Before diving into your crochet keychain, ensure you are comfortable working in continuous rounds. Utilizing a stitch marker can be helpful for keeping track of your rounds. It’s beneficial to maintain tight and even stitches, especially when creating small pieces, to avoid visible stuffing. Plan out any color changes you may want and prepare your keychain ring or clasp beforehand.

    Free Crochet Keychain Pattern

    Foundation or Magic Ring

    1. Start with a magic ring:
      • Create a loop with your yarn.
      • Insert your hook, yarn over, and pull through.

    Main Body

    1. Round 1: 6 sc into the magic ring.
    2. Round 2: inc in each st around (12).
    3. Round 3: (sc in next st, inc) around (18).
    4. Round 4: (sc in next 2 sts, inc) around (24).

    Decorative Details

    • Depending on your design, you may want to add features such as eyes, a mouth, or decorative elements with embroidery or other yarns.

    Attaching the Keychain Ring

    1. Once the body is complete and you have finished any decorative details, prepare the keychain ring.
    2. Position the ring at the top center of your keychain and secure it tightly with a few stitches through the yarn.

    Finishing Details

    Ensure all yarn ends are secured and tucked away neatly. This creates a polished final appearance. You can add any finishing touches like additional embroidery for embellishments or extra color details as desired.

    How to Use Your Crochet Keychain

    Once completed, this crochet keychain can be used as a delightful accessory for your keys, a charming backpack charm, or as a unique handmade gift for friends and family. It also makes a thoughtful souvenir, adding a personal touch to your collection.

    Tips for a Better Result

    • Maintain even tension throughout your rows to ensure a consistent appearance.
    • When working with small pieces, make sure your stitches are neat to avoid any visible stuffing.

    Crochet Keychain Customization Ideas

    • Utilize different yarn colors for a unique touch.
    • Consider adding personalized embroidery or decorative bows.
    • Experiment with various yarn types for different textures.

    Common Problems and Troubleshooting

    • Uneven Stitch Counts: Ensure you are counting your stitches after each round.
    • Visible Stuffing: Work tightly to prevent stuffing from showing through small stitches.

    Care and Safety

    Maintain your crochet keychain by following the yarn manufacturer’s cleaning instructions. Be mindful of any detachable parts and ensure they are safe to use, particularly if intended for children.

    Frequently Asked Questions

    • Is this crochet keychain pattern beginner-friendly? Yes, it is perfect for beginners!
    • What yarn is best for crochet keychains? Cotton or acrylic yarn works well.
    • How long does it take to crochet a keychain? Approximately 1-2 hours.
    • Can I make this crochet keychain larger or smaller? Yes, you can adjust your hook size and yarn weight accordingly.
    • How do I attach a keychain ring? Securely stitch through the yarn at the desired attachment point.

    Conclusion

    Making your own crochet keychain is not just a fun project; it creates lasting memories and personalized touches for your key accessories. Whether you’re crafting for yourself or as a special gift, this crochet keychain reflects your creativity and adds a whimsical charm reminiscent of collectible Christmas ornaments.


    SEO Title: Trendy Crochet Keychain Pattern for DIY Gifts
    Meta Description: Discover our unique crochet keychain pattern, perfect for creating handmade gifts. Easy to follow and ideal for beginners!
    URL Slug: crochet-keychain-pattern
    Primary Keyword: crochet keychain pattern
    Secondary Keywords: easy crochet keychain, mini crochet keychain, DIY crochet keychain, crochet animal keychain
    Image 1 Alt Text: Crochet keychain displayed with vibrant yarn
    Image 2 Alt Text: Completed crochet keychain with keychain ring attached

  • Easy Free Crochet Mini Santa Hat Pattern for Party Decor

    Easy Free Crochet Mini Santa Hat Pattern for Party Decor

    Easy Free Crochet Mini Santa Hat Pattern for Party Decor

    Add a festive touch to your holiday celebrations with this adorable Easy Free Crochet Mini Santa Hat Pattern for Party Decor! This charming mini Santa hat is not only cute but also versatile, making it perfect for decorating keychains, bags, or as a delightful handmade gift for friends and family. Imagine the smiles it will bring as a keychain accessory, a whimsical bag charm, or a cheerful addition to your holiday decor. Suitable for crocheters of all skill levels, this easy pattern promises to be both enjoyable and rewarding. Grab your hook, and let’s get started on crafting this merry little accessory!

    Crochet Keychain Pattern Overview

    • Skill Level: Easy
    • Finished Size: Approximately 2.5 inches tall
    • Crochet Hook Size: 3.5 mm (E)
    • Yarn Type: Acrylic yarn
    • Yarn Weight: Light worsted (category 3)
    • Main Colors: Red, white
    • Construction Method: Worked in rounds
    • Approximate Completion Time: 1-2 hours
    • Beginner-Friendly: Yes
    • Type of Keychain Attachment: Keychain ring

    Materials You’ll Need

    • Red acrylic yarn
    • White acrylic yarn
    • 3.5 mm (E) crochet hook
    • Keychain ring or clasp
    • Yarn needle
    • Stitch marker
    • Scissors
    • Stuffing (optional)

    Crochet Abbreviations

    • MR = magic ring
    • ch = chain
    • sc = single crochet
    • inc = increase
    • dec = decrease
    • st = stitch
    • rep = repeat

    Before You Start

    Before diving into the pattern, here are a few tips to help you create a lovely mini Santa hat:

    • Maintain Tight Stitches: Miniature patterns benefit from evenly spaced stitches to avoid gaps.
    • Use a Stitch Marker: Mark your rounds to track your progress and maintain a clean finish.
    • Prepare the Keychain Ring: Ensure your keychain ring or clasp is ready to attach once your hat is complete.

    Free Crochet Keychain Pattern

    Foundation or Magic Ring

    • Round 1: Create a magic ring, and work 6 sc into the ring (6 sts).

    Main Body

    • Round 2: Inc in each st around (12 sts).
    • Round 3: Sc in the next st, inc in the next st; repeat from * to * around (18 sts).
    • Round 4: Sc in the next 2 sts, inc in the next st; repeat from * to * around (24 sts).
    • Rounds 5-7: Sc in each st around (24 sts).
    • Round 8: Sc in the next 2 sts, dec over the next 2 sts; repeat from * to * around (18 sts).
    • Round 9: Sc in the next st, dec over the next 2 sts; repeat from * to * around (12 sts).

    Decorative Details

    • Change to white yarn.
    • Round 10: Sc in each st around (12 sts).
    • Round 11: Dec over the next 2 sts; repeat around (6 sts).

    Finishing the Keychain

    • If desired, stuff lightly.
    • Slip stitch to join, fasten off, and weave in ends.

    Keychain Construction and Assembly

    To assemble your mini Santa hat keychain:

    1. Confirm stuffing is even throughout the hat.
    2. Position the hat on the keychain ring and secure it tightly.
    3. Weave in any loose yarn ends for a polished look.

    Attaching the Keychain Ring or Clasp

    • Attach the keychain ring through the top of the hat.
    • Ensure it is securely positioned to prevent detachment during use.

    Finishing Details

    As a final touch, you might want to embroider a small pom-pom on the tip of the hat using white yarn or add decorative elements if you prefer a personalized touch.

    How to Use Your Crochet Keychain

    This charming mini Santa hat serves multiple purposes:

    • As a keychain accessory to brighten your daily essentials.
    • A cute backpack charm that spreads holiday cheer wherever you go.
    • A lovely, handmade gift perfect for sharing holiday spirit with loved ones.

    Tips for a Better Result

    • Keep a Uniform Tension: This helps maintain the mini hat’s shape.
    • Work Slowly with Small Stitches: Focus on precision as you work to keep the detailed structure intact.
    • Secure the Yarn Ends: Prevent any fraying or untidiness with neatly woven ends.

    Crochet Keychain Customization Ideas

    You can personalize your mini Santa hat keychain by experimenting with:

    • Different shades of red and white yarn.
    • Adding sparkly yarn for a festive flair.
    • Personalizing with small embellishments or charms to suit your style.

    Common Problems and Troubleshooting

    If you encounter issues while crocheting, consider these:

    • Uneven Stitch Counts: Count your stitches periodically to catch mistakes early.
    • Loose Keychain Attachment: Reinforce the connection to prevent it from coming loose over time.

    Care and Safety

    To care for your crochet keychain:

    • Spot clean according to the yarn’s care instructions.
    • Be mindful of small parts around young children, especially if your design includes embellishments.

    Frequently Asked Questions

    1. Is this crochet keychain pattern beginner-friendly?

      • Yes! This pattern is designed to be accessible for beginners.
    2. What yarn is best for crochet keychains?

      • Light worsted acrylic yarn works well for durability and ease of use.
    3. How long does it take to crochet a keychain?

      • This project typically takes 1-2 hours.
    4. Can I make this crochet keychain larger or smaller?

      • Adjustments can be made with different hook sizes and yarn weights.
    5. How do I attach a keychain ring?

      • Simply thread the ring through the top of the hat and secure it.
    6. Can I use different yarn colors?

      • Feel free to experiment with any color combinations you like!
    7. How do I keep the finished keychain in shape?

      • Using consistent tension and stuffing can help maintain its shape.
    8. Can I use this crochet keychain as a bag charm?

      • Absolutely! It makes a delightful bag charm as well.

    Conclusion

    This Easy Free Crochet Mini Santa Hat Pattern for Party Decor is a charming way to get into the holiday spirit. Its cute design and practical uses make it a delightful project for any crocheter. So grab your materials, follow the pattern, and let your creativity shine with this festive keychain!


    SEO Title: Easy Free Crochet Mini Santa Hat Keychain Pattern
    Meta Description: Create a festive Easy Free Crochet Mini Santa Hat Keychain with this beginner-friendly pattern, perfect for gifts or holiday decor!
    URL Slug: easy-crochet-mini-santa-hat-keychain
    Primary Keyword: easy crochet mini Santa hat keychain pattern
    Secondary Keywords: crochet keychain pattern, free crochet keychain pattern, mini crochet keychain, DIY crochet keychain
    Image 1 Alt Text: Crocheted mini Santa hat, perfect for keychain or bag charm
    Image 2 Alt Text: Festive crochet mini Santa hat keychain showcasing handmade details

  • Christmas Gingerbread Amigurumi Keychains – Cute Crochet Gift Idea 🎄🧸

    Christmas Gingerbread Amigurumi Keychains – Cute Crochet Gift Idea 🎄🧸

    Christmas Gingerbread Amigurumi Keychains – Cute Crochet Gift Idea 🎄🧸

    Looking for a cute handmade Christmas crochet idea? These adorable gingerbread amigurumi keychains make the perfect gift for anyone on your list. Their charming design brings the festive spirit into your home, making them ideal for gifts, stocking stuffers, and even fun decorations for your holiday gatherings. With a touch of whimsy and a dose of cuteness, these keychains can easily brighten up bags or keys, adding a personal touch to your accessories. This pattern is suitable for crocheters of various skill levels, especially those looking to create quick and delightful DIY projects for the holiday season.

    👉 Discover more crochet inspiration and patterns at Amyliva.com! Save this pin and follow AmyLiva Handmade for more cozy amigurumi ideas! 🧶💛

    Crochet Keychain Pattern Overview

    • Skill Level: Beginner to Intermediate
    • Finished Size: Approximately 3 inches tall
    • Crochet Hook Size: 3.5mm (E)
    • Yarn Type: 100% acrylic yarn
    • Yarn Weight: Worsted weight (Category 4)
    • Main Colors: Brown for the gingerbread, white for icing, and optional colors for decorations
    • Construction Method: Worked in rounds
    • Approximate Completion Time: 2-4 hours
    • Project is Beginner-Friendly: Yes
    • Type of Keychain Attachment: Metal keychain ring

    Materials You’ll Need

    • Brown yarn for body
    • White yarn for icing
    • Optional colored yarn for decorations (red, green, etc.)
    • Crochet hook (3.5mm/E)
    • Keychain ring or clasp
    • Yarn needle
    • Stitch marker
    • Scissors
    • Stuffing (small amount)
    • Safety eyes (optional for added facial features)
    • Embroidery thread for facial features (optional)

    Crochet Abbreviations

    • MR = magic ring
    • ch = chain
    • sc = single crochet
    • hdc = half double crochet
    • dc = double crochet
    • sl st = slip stitch
    • inc = increase
    • dec = decrease
    • st = stitch
    • rep = repeat

    Before You Start

    To enjoy a smooth crocheting experience with your gingerbread amigurumi keychain, remember to work in continuous rounds to avoid visible seams. Use a stitch marker to keep track of your rounds, and maintain even tension throughout your work to ensure a tidy finish. Prepare your keychain ring or clasp ahead of time, so you can easily attach it at the end. Don’t forget to check your stitch counts frequently, especially in such small pieces!

    Free Crochet Keychain Pattern

    Foundation or Magic Ring

    Round 1: Create a magic ring and chain 1. Work 6 sc into the ring.

    Main Body

    Round 2: Inc in each stitch around (12 stitches).
    Round 3: Sc in next stitch, inc in next; repeat around (18 stitches).
    Round 4: Sc in next 2 stitches, inc in next; repeat around (24 stitches).
    Round 5-10: Sc in each stitch around (24 stitches).

    Head

    Round 11: Sc in next 2 stitches, dec; repeat around (18 stitches).
    Round 12: Sc in next stitch, dec; repeat around (12 stitches).
    Stuff the head lightly.
    Round 13: Dec around (6 stitches). Fasten off.

    Ears

    Make 2:
    Round 1: Ch 4, sc in 2nd ch from hook, hdc in next, dc in last. Fasten off and sew to the top of the head.

    Attaching the Keychain Ring

    Sew the metal keychain ring onto the top of the head for an easy attachment.

    Finishing the Keychain

    Add any embroidery for facial features or decorative icing. Ensure all ends are securely fastened.

    Keychain Construction and Assembly

    To assemble your gingerbread keychain, begin by sewing the head to the body. Position the ears so they sit symmetrically on top. Secure your keychain ring at the crown of the head and ensure that it is tightly attached. Finally, add any decorative elements such as embroidery for facial features or other embellishments to give your gingerbread keychain personality.

    Finishing Details

    Carefully secure any loose yarn ends. You can add embroidered eyes and mouth or use safety eyes for a fun touch. To complete the finishing touches, stitch some white yarn around the seams to mimic icing details. These small elements enhance the overall appeal and charm of your gingerbread keychain.

    How to Use Your Crochet Keychain

    This delightful gingerbread keychain serves multiple purposes. It can be used as a charming keychain accessory, a custom backpack charm, a lovely handbag decoration, or a handmade gift for friends and family. Its unique design makes it a fantastic small crochet souvenir or personalized accessory for anyone who cherishes handmade crafts.

    Tips for a Better Result

    • Maintain even tension throughout your crocheting to keep the stitches tight and neat.
    • When creating small pieces, take care to avoid visible stuffing by using small amounts and evenly distributing it.
    • Be mindful of color changes, and position decorations symmetrically for a polished look.
    • Secure all ends properly to ensure the durability of your keychain.

    Crochet Keychain Customization Ideas

    Unleash your creativity with endless customization options! Consider using different yarn colors, mixing and matching color combinations, adding fun bows for decoration, or personalizing your keychain with initials. Experimenting with different yarn types can also yield unique textures, giving each keychain a distinctive flair.

    Common Problems and Troubleshooting

    • Uneven stitch counts: Keep a close eye on your stitch counts at the end of each round to avoid discrepancies.
    • Visible stuffing: Use only small amounts of stuffing and spread it out evenly within the head and body.
    • Crooked facial features: When attaching safety eyes or embroidering, measure and mark positions before proceeding to ensure symmetry.

    Care and Safety

    To maintain your handmade crochet keychain, check the yarn manufacturer’s cleaning instructions as care can vary. Be cautious with small detachable parts such as safety eyes and metal rings, as these may pose a chocking hazard for young children.

    Frequently Asked Questions

    • Is this crochet keychain pattern beginner-friendly?
      Yes, this pattern is suitable for beginners with some crochet experience.

    • What yarn is best for crochet keychains?
      Worsted weight acrylic yarn is recommended for durability and ease of use.

    • How long does it take to crochet a keychain?
      Typically, it will take about 2-4 hours, depending on your crochet skill level.

    • Can I make this crochet keychain larger or smaller?
      Yes, simply adjust the yarn weight and hook size.

    • How do I attach a keychain ring?
      Sew the ring onto the top of the head after completing the crochet work.

    • Can I use different yarn colors?
      Absolutely! Experiment with colors to make unique designs.

    • How do I keep the finished keychain in shape?
      Light stuffing will help maintain its form. Ensure seams are well secured.

    • Can I use this crochet keychain as a bag charm?
      Yes, they make excellent bag charms and can add a personal touch to any accessory.

    Conclusion

    Get started on your own Christmas Gingerbread Amigurumi Keychain today! This delightful crochet project brings a touch of cheer to the holiday season and is sure to be cherished by recipients. Plus, it’s an easy and enjoyable way to express your creativity through crochet.


    SEO Title: Cute Christmas Gingerbread Amigurumi Keychain Pattern
    Meta Description: Make adorable Christmas gingerbread amigurumi keychains! Perfect as gifts or festive decorations. Free crochet keychain pattern included!
    URL Slug: gingerbread-amigurumi-keychain-pattern
    Primary Keyword: Christmas Gingerbread Amigurumi Keychains
    Secondary Keywords: easy crochet keychain, amigurumi keychain pattern, crochet keychain gift ideas
    Image 1 Alt Text: Classic gingerbread crochet keychain design
    Image 2 Alt Text: Close-up of handmade gingerbread amigurumi keychain

Ruby’s Crochet Keychains

Your free crochet ebook

Leave your email address to request your free crochet ebook.

Join Our Community

Your email address will be used to handle your ebook request.Privacy policy